Wednesday 28 April 2010

super duper uber light

Disclaimer: I mean no offense to anyone whose primary hobby is lightweight backpacking or camping, in fact I have a great deal of respect for the ideals and practices of those for whom the way of the scales is a way of life, however, this way of life is not mine, and as such I may just take the pee a little. Sorry.

Going lightweight.

‘Oh my god’, you’re probably all thinking, ‘please don’t turn into one of those thousands of lightweight backpacking blogs’ – you know, the ones written by people seemingly obsessed with cutting every last gram of weight from what they’re carrying, quite literally.

Now, I’m not one to slag off what are often very well thought out, entertainingly written and occasionally inspirational articles and posts, but come on people – cutting off the handle of your toothbrush to save weight? Is this not a tad excessive? Besides, why are you even carrying a toothbrush on a single night’s wild camping on Dartmoor?
So what’s my point? Well I guess my point is that the ‘going lightweight’ concept does very much have a place in modern day hill sport, be that walking, climbing, or in the most critical and extreme cases, Alpinism. However, it often seems to me that the increasingly popular gram counting, lightweight backpacking obsession is just a futile exercise designed to encourage people to buy more and more expensive gear.

That said, some of the lightweight backpacking forums are actually full of homemade kit ideas, where people have decided that commercially available products either aren’t light enough or simply don’t do what they envision wanting. Sometimes all this yields is a vast number of slightly different designs for gravity defying alcohol stoves, which, whilst looking like great fun to make, would likely be woefully inadequate when battling your way up a 3 day route on a large Alpine North face. Sometimes though, these homemade options really do make a difference.

Now, I’m not interested in carrying a pack that weighs less than one of my bras when I go wild camping, far from it – for me, the heavier the bag (within reason), the better the training effect*.
I am however, hugely interested in ways of reducing the load needed for an Alpine bivvy, and also ways of improving the efficiency and effectiveness of the equipment I do carry. And this is where the lightweight backpacking concept steps in to provide ideas and inspiration.

Often the best way of reducing the weight of what you’re carrying, is simply not to carry it. Leave the things you don’t absolutely need behind. To this end, my latest project has involved cooking equipment, or more specifically, my cooking pot.
I own several pieces of ‘camping cookware’ from kettles and large pans, to mugs you can cook in. By far the most useful and versatile item I own though, is a simple 1l ‘solo’ pot made by Primus (I think it’s called a Trek Kettle or something like that). Now, it may not be the lightest option out there, but it’s a good size, it’s sturdy and well made, and most importantly, I like it. The only negative side it has is the fact that the ‘lid’ is actually a mini frying pan.
Why is the frying pan lid a negative? Surely it just makes the thing more versatile? Well, yes and no. Yes it does make it more versatile in principle, but I’ve never used the damn thing and can’t ever envisage doing so. It is also quite heavy, so leaving it behind is no loss, except of course, it is a loss because all of a sudden the pan has no lid and loses a great deal of cooking efficiency, meaning you use more fuel.

So what to do…
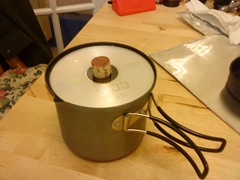
I decided to make a new lid. A lovely, simple, homemade, cheap (aka free), lightweight lid:
DSC00100

Ta da. Yep, it’s a CD.

I was stunned and delighted to discover that a normal CD was actually the perfect fit, and upon testing it proved to be really rather efficient as the inside layer is of course reflective. The only question then was of what to make a handle out of when a blinding flash of inspiration hit me – Phil was drinking wine…So I simply carved the cork to wedge in the hole in the centre of the disk.

I don’t know how long this lid will actually last, but seeing as it was essentially free to make from waste products and only took about 2 minutes to work and assemble, it won’t exactly be a problem to replace it every once in a while.

On a slightly different note, anyone with some time to kill could do worse than to entertain themselves by browsing some of the ‘lightweight’ forums, especially the American ones…there really are some fantastical and bizzarre ideas out there…


*For anyone who hasn’t been following this blog for long I shall just summarise – I’m primarily a rock climber, but am also broadening my horizons into the world of Alpine Climbing and Mountaineering, so for me, days spent hacking round the Welsh hills with a hefty rucksack, provide good ‘hill training’ in preparation for carrying big loads of climbing equipment on top of basic bivvy gear, at altitude. The fitter I get, the better I will do when I head out to the proper mountains. So whilst carrying a rucksack that weighs less than a packet of crisps is undoubtedly more pleasant than carrying a full load of ropes and hardware etc, it simply won’t provide as great a training effect.
Tuesday 27 April 2010

gear we like, part 5: guidebook covers

Have you ever found yourself half way up one of several pitches on a route, looking up at two crack systems running in different directions, trying desperately to remember which way the guidebook said to head to find the belay stance?

Or have you ever sorted your gear at a stance, prepared to head off up the wall but then realised that you can’t remember which way the damned route actually goes, and nor can your partner (this is especially relevant if, like me, you enjoy climbing in the Moelwyns).

Have you ever simply guessed which way to head and been wrong, finding yourself stuck out on a blank wall in the middle of nowhere with no gear to be found, wondering what on earth you are going to do as you valiantly fight to hold your sphincter closed?

If you can relate to any of the above scenarios, my guess is that you often don’t bother to carry the guidebook with you on routes. There are several reasons why carrying the guide can be a total pain:

  • They can be quite heavy
  • They are generally pretty bulky
  • Fitting a guidebook into a pocket is usually insanely uncomfortable and sometimes impossible (if you don’t have a pocket big enough for instance)

Having experienced a number of ‘route finding challenges’ over the course of my climbing career, the notion of actually taking the guidebook with us on routes that could be more involved than a single pitch ‘follow the crack’ type jobby, had started to become more and more sensible in my mind. I still hated doing it mind you, as I never had a pocket big enough to fit the damned thing in and always had to shove it down my shirt, which, as you can probably imagine, isn’t the most comfortable feeling in the world (especially if it has sharp corners and you’re climbing a chimney…)

One day one of my climbing partners turned up at the crag with a DMM guidebook cover. My first thought was one of ‘great, just an extra thing to carry’, shortly followed by ‘hmm, interesting, looks like you can just clip it onto your harness’.

In case you haven’t yet grasped why guidebook covers are a truly brilliant invention, it is for one reason and one reason alone:

  • You can clip them to your harness.

Ok so this doesn’t get around the weight issue, but the bulk and lack of suitable pockets suddenly doesn’t really matter – you can simply hang the thing out of the way at the back of your harness.

Brilliant.

So when you’re stood at that belay stance you can simply grab the guidebook and have a read to refresh your memory, rather than relying on a vague and distant mental image of the crag topo that you spent all of about 3 seconds looking at before you started the first pitch 3 hours ago. All of a sudden, when you’re staring up at those two opposing crack systems, you can fumble the book into view and read which one you’re supposed to take (or even better, you can leave the book with your second and get them to read it out to you!).

Oh, and you can leave it attached to you whilst you read – no more risk of fumbling the book out of an ill fitting pocket and then dropping it down the crag into the undergrowth of oblivion.

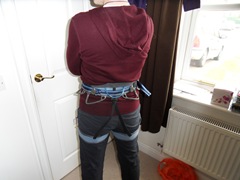
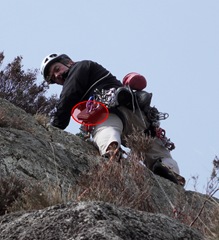
guidebook cover Here you can see Patrick carrying the guidebook on his harness – I’ve highlighted it to make it easier to spot

Several companies make guidebook covers, off the top of my head I’ve seen ones made by DMM (the one I use), Outdoor Designs and POD. There are probably others too. They all do the same job and all look good, the DMM is made of Neoprene and therefore stretches to fit slightly chunkier guidebooks (such as the Ground Up North Wales Rock book), but from looking at the likes of the POD which is made from Ripstop Nylon, these are sized brilliantly to accommodate books of varying sizes anyway.

I have never used a ‘larger’ cover for guidebooks of the RockFax size category, simply because these really do seem to be getting too big and bulky to have dangling from your harness. I could be wrong, and they could be fine, but to be honest I haven’t found any need to ever carry a RockFax guide up a route as they generally tend to cover mostly single pitch routes where using your memory shouldn’t be a problem. That said, I can foresee a cover for my new Pembroke guide may prove useful as you need to abseil in to the routes and will almost certainly need the guide at the bottom…

Monday 19 April 2010

sunny wild camping in the Rhinogs

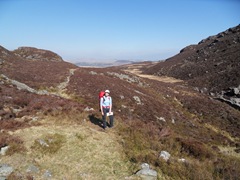
Phil and I took advantage of some of the good weather we’ve been having to head out into the wilderness for a nice walk and wild camp. Now, I should say that this is the first time I’ve done a ‘serious’ walk like this with Phil, and as such it was a great experience – not really my style of walking as I normally view hill walking simply as a means to gain fitness, not an end in itself, so to simply walk to enjoy the experience and the surroundings was a refreshing change.

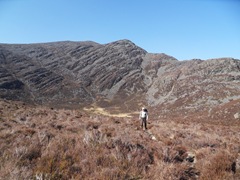
We parked up at the farm on the Dolgellau side of the Rhinogau and proceeded to make our way through the forest and out into Bwlch Drws-Ardudwy, one of the two major mountain passes (the other being the ‘Roman Steps’.

SDC10132

Here we enjoyed a leisurely lunch, trying out a cheap couscous ‘bivi meal recipe’ I’d concocted, which was ok but not good enough to write about or even do again – still, all experimentation is good.

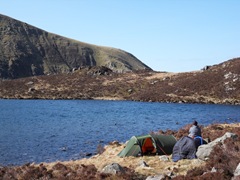
Next we headed up the side of Rhinog Fach towards our intended camp site at the side of Llyn Hywell. The weather up until this point had been simply stunning – sunny and warm, not a cloud in the sky. Unfortunately, upon reaching the upper Llyn, a bitterly cold wind coming across the lower ridge took hold, seeming to suck away all the sun’s warmth.

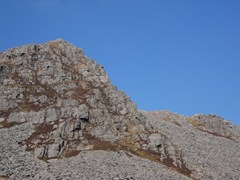
We wandered round a bit before settling on the most sheltered spot, which as per normal universal laws, was of course the first one we’d looked at. Abandoning our sacks here we proceeded to head up to the summit of Rhinog Fach, admiring the South Ridge from the path up. The South Ridge looked like a mighty fine, if not hugely long, scramble, but upon returning home and consulting the guidebooks turns out to actually yield a route graded Severe! I shall have to go back.

SDC10146 Phil with the mighty Rhinog Fawr in the background

SDC10161 The South Ridge of Rhinog Fach, a gritstone mountain Severe!

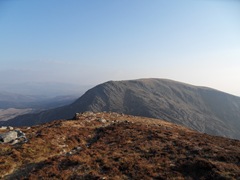
SDC10176Y Llethr, the highest point in the Rhinogs, from the summit of Rhinog Fach 

Upon descending from the summit and making our way back across the pathless boulder-field at the side of the Llyn, we re-found our bags and proceeded to pitch the tent in winds which had by now gotten quite strong. This is my excuse for why I proceeded to ‘enjoy’ one of the worst night’s sleep I’ve ever had in the tent – I’d managed to position the tent with my head in a hollow, and Phil’s on a tussock. Swapping sides just meant I went from feeling light-headed to having the tent flap in my face on the wrong side* as I tried to avoid the lumpy tussock I now had possession of.

I re-learned another valuable lesson that night – leaving behind my ipod and/or a book of some kind was a mistake. I had hoped to sit out and watch the sunset and then stare at the stars in the crystal clear sky for a while before going to sleep, but the bitterly parasitic wind put paid to that idea and the lack of conversational topics we hadn’t already covered a million times before made for a rather stale time. Needless to say I did not sleep well either.

Enough of the whinging though, the morning was truly beautiful, still windy but the sun did its best to fight off the worst of the cold as we aired our sleeping bags in the breeze and had a very leisurely session striking camp.

SDC10186

We gave up on the idea of heading up Rhinog Fawr as well after I managed to get a bit of grit lodged in my eye so I spent the first 3 or 4 hours of the day in agony. Note to self: buy a tiny little mirror to pack in the first aid kit.

So day 2 was spent meandering back down the Bwlch and around towards the Roman Steps, then back through the forest to the truck where our first thought was of brewing a nice cuppa using the MSR petrol stove Phil keeps in the back of his bright red pickup. This was, on the surface, a perfectly simple and good idea. Unfortunately I decided to try to be helpful and get the stove going…

To cut a long story short, I had forgotten about the priming procedure you have to go through with the MSR, and so proceeded to light the stove with the fuel supply on, which then led the thing to start dripping petrol from the base of the stove burner, and onto the tailgate of the truck (should have put the damned thing on the floor, but we always do it like this and have never had this issue before). It took me a few seconds to realise what was dripping from the stove, by which time, fairly predictably, the whole lot had caught fire. Yes, I set fire to the truck. Thankfully Phil wandered over at this point, just as I had registered what was happening, turned off the fuel supply and started to flail and cry out “it’s burning, it’s burning, it’s all on fire!” in the most useful way possible. Before I’d had time to pull myself together and deal with it, Phil grabbed the fuel bottle and dropped the stove to the ground where it burnt itself out without doing any more damage. Fortunately I hadn’t actually set fire to the truck, just a small patch of the tailgate, oh and the stove’s stuff bag, and so casualties were minimal. We did then proceed to light the thing properly with it on the ground, and brew our cuppa. It was just a shame Phil elected to try using some ancient milk powder rather than digging the UHT sachets out of my rucksack, and the tea ended up tasting like rancid, rotten bin water.

Wild camping is always an interesting experience, and each time I do it I come back with lots of thoughts and ideas about how I could do things better, and this trip was no exception. I may well put a blog entry together with some of the better little tips I’ve picked up over time, and some of my thoughts on some of the more pointless things we seem to end up doing.

*Yes, there is a right and a wrong side – I am a particularly awkward sleeper at the best of times, and I need to be on my side of the bed/tent otherwise things just don’t feel right.

Wednesday 14 April 2010

pimp my harness

Disclaimer: Modifying your harness in any way is not to be recommended. You will definitely void any kind of warranty, and what’s more, you could end up causing structural damage to what is one of the most safety critical pieces of climbing equipment you will ever own.

If you don’t like something, change it.

This is a philosophy I have been known to apply in many areas of my life, from where I’ve been living, to the job I’ve been doing, the kind of food I’ve been eating etc etc, but in this instance I’m talking, once again, about climbing equipment.

Now, anyone who has been following this blog for a while will know that I’m not averse to ‘improving’ pieces of equipment that I’ve bought but which have just not been quite right (a prime recent example being the sprung leashes for my ice axes).

This time it is the turn of my harness. I have already made small modifications to it in the form of adding extra webbing straps for fixing more ice screw clippers, but this time I have finally gotten round to adding a much needed fifth gear loop on the back.

Basic info:

  • My harness is a Petzl Corax, and is about 7 years old (I can’t remember exactly when I bought it, but it is certainly no younger). It has been used extensively over it’s lifetime, from indoor top roping, to long runout scary ice leads, to Alpine mountaineering, but by far the greatest amount of use it now gets is for UK trad climbing.
  • It has four plastic moulded gear loops which all slope forwards in order to bunch all your gear up in a horrifically annoying fashion.
  • I am a total wuss when it comes to downclimbing/scrambling on wet grass in rock shoes, and as such I often like to carry my approach shoes up with me, clipped to my harness.
  • I sometimes like to carry the guidebook clipped to me in a lovely guidebook cover, along with my camera and sometimes other items.
  • I also sometimes tend to carry quite alot of gear.

All of these points add up to this: a fifth gear loop out of the way on the back of my harness would be awesome. I could clip my shoes on it so they don’t get in the way so much, and I could also clip all the ‘non-primary climbing equipment’ bits onto it to allow more room on my main gear loops for, yes you’ve guessed it, gear.

Here we go then, time to pimp my harness:

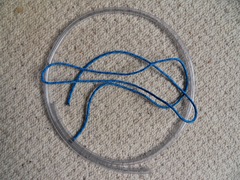
Firstly, what do we need? Well, I’ve decided to use some 3mm climbing accessory cord, inside some 5mm diameter PVC tubing (bought at my local hardware store):

SDC10109

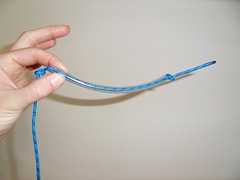
Next, I worked out the length of pipe and cord needed to make a sensibly sized loop, then made it by threading the cord through the pipe and tying an overhand knot in each end, allowing 2-3mm of space between the end of the pipe and the knot each side:

SDC10111

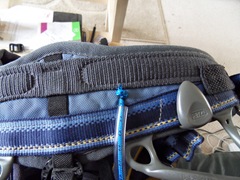
Next, I used some strong cotton thread and a decent needle, to sew one end of the cord onto the padding of the harness (note, I am not sewing through the strength critical harness webbing). The technique I’ve used to fix the loop on is to simply sew round the cord underneath the knot so it can’t slide through:

SDC10114

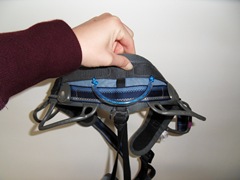
Finally I sewed the other end of the gear loop onto the harness, making sure that the loop was going to be nicely central, and of a sufficient depth to make clipping things to it simple:

SDC10116

And this is the final result:

SDC10117 

Hopefully I have used enough stitches (if you do decide to copy this, make sure you stitch over and over and over again, the more thread you use, the stronger it will be), and the loop will prove to be yet another ‘life extender’ for my old friend.

Sunday 11 April 2010

sunny spring climbing, part 2

Saturday: I was still not feeling too great so we headed back to the Moelwyns for some more pleasant, relaxed, sunny climbing.

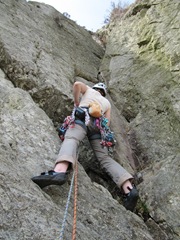
The White Streak/Honeysuckle Corner – HS 4b. (Craig yr Wrygsan) A combination of two routes which in reality should only be one anyway! The guidebooks (both Meirionnyd and North Wales Rock) both give this combo 2 stars, but in all honesty I would easily give it 3, it is a simply fantastic climbing experience. Patrick led the White Streak - a long slab which can be split into two pitches, but is much better just climbed as one long one up to the big ledge (‘the Pasture’) and is quite bold in places (i.e. very little gear of substance), but is climbed on fantastically massive gas pocket jugs – they are holds of wonder, seriously!

So Honeysuckle Corner was my route of choice, and I must say it was a cracker. A steep pull into a corner groove with lots of good holds, some fantastic bridging and great gear (or at least it is if you bother with it), leads you up to some ledges and a huge block belay at the very top of the crag – a fantastic place to enjoy the sun and the view. This pitch is HS 4b, but for some may well seem more like VS simply because of its steepness, but don’t let that put you off, the moves and holds are good and the gear is plentiful – go do it!

IMG_0360

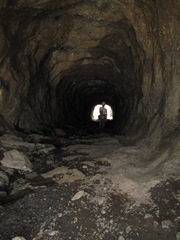
The walk down from the top of this crag is also quite something – you wander down the back into some old quarry workings, and make your way down into a tunnel through the crag where the old incline runs. Step over the old incline engine machinery and make your way down through the crag! Turn off to the left down from the incline back to the base of the crag either before the ‘Danger’ sign or just after, it doesn’t matter. Then go and climb something else, even if it is easy…

IMG_0370

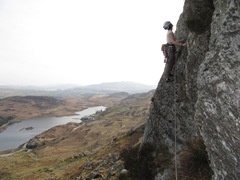
Y Gelynen – VDiff but with a Severe variation finish. I know, me, climbing a VDiff. A bit of a rarity huh? This was the other route that got 2 stars in the guide and just looked a really nice line, and indeed it was. I would say though, that if you aren’t confident climbing Severe or above, this route may prove a rather serious proposition – the first pitch is described as ‘bold’, so read this as ‘has very little gear and quite alot of exposure’. Good holds though, and so long as you keep your head together and just keep on climbing, rather than looking for gear where there really is none and proceeding to panic, the sanctuary of the somewhat uncomfortable but well endowed flake belay will be yours without any real drama (and yes, I did actually lead this pitch without any drama thank you very much).

IMG_0375

The second pitch is quite short but straight forward, although once again is rather lacking in meaningful gear to start with – very simple to second! You end up on the big ‘Pasture’ ledge again, after which a third pitch takes you to the top – here you have a choice of the VDiff option up the steppy buttress part, or the vastly superior and really rather fun groove just to the left of the VDiff line – this variation bumps the grade up to Severe as it has a couple of harder moves, although this time with some good protection options (and as I led the first pitch, I rather pleasantly got to lead this one too). You could run the second and third pitches together if you wanted to as they are both quite short, but we decided it would be more sociable to climb it in two as per the guidebook – so we were able to shout abuse at each other the whole time!


The Moelwyns are currently my absolute favourite place to climb, the atmosphere is lovely, the rock is great and the routes are good fun. I just hope it all stays this way and doesn’t become another packed ‘Stanage-esque’ venue where you find yourself queuing for routes polished well beyond their prime state. That said, I do think more people should experience just how wonderful some of these crags are and get a real taste of what Welsh rock climbing is all about.

sunny spring climbing, part 1

It is once again rock climbing season. Sadly I’ve all but given up on any hope of getting any more winter routes in, so what with all the lovely sunshine we’ve been having, I’ve once again embarked on the somewhat painful process of re-adjusting to rock. Sadly it isn’t going as well as it perhaps could for a number of reasons I won’t go into on here, but, that said, I clearly haven’t completely lost the ability to climb, I’m just having some trouble getting my head in gear.

Anyway, enough excuses. This is what I’ve been up to:

Thursday: A lovely day climbing at Tremadog with Ritchie. We decided to take it easy and just repeat a couple of nice ‘straight forward’ routes we had climbed previously. Fairly predictably, the ‘easy’ VS routes felt much, much harder than they should – not good.

Yogi – VS 4b. This route is a bit of a guidebook oddity in that the top pitch appears to be the same for three routes, but with two different technical grades…If anyone can shed any light on the bizarreness in the current Tremadog guide between the second pitches of ‘Yogi’ and ‘Smarter than the Average Bear’ (and indeed, ‘Mr Ranger’), or can provide me with some kind of explanation as to how the crystal filled layback crack can a) be described in two different ways, and b) have two different technical grades (4b or 4c), then please let me know! (There is always the possibility that I’m just being blonde and stupid, but this is unlikely as I’m not the only one confused!) Anyway, this was the third time I’ve climbed this route – it’s a nice ‘easy’ VS with a lovely layback crack on the top [guidebook oddity] pitch, and I highly recommend it! Make sure you bring some small wires for the first pitch though.

Grim Wall – VS 4c. Great route. Not much more to say really! This was the second time I’ve done Grim Wall, and this time I led the easier first pitch seeing as I took the lovely steep crux pitch last time. Sadly I have to admit to behaving like a total wuss when I got to the big hand traversey flake on the first pitch…I really, really, really hate traversing – even if it’s easy (and in this case it really is).


Friday: I really wasn’t feeling too good, so a very lazy start landed Patrick and I in the Moelwyns sometime after lunch. We climbed one route (and yes, I know, only climbing one route is pretty pathetic, especially as it was just a Severe).

For anyone who has never been to and experienced the wonders of Blaenau Ffestiniog, the Moelwynian crags provide (in my opinion) some of the best easy to moderate routes in Wales. Strangely, despite their sunny south facing aspect, fantastic unpolished rock, interesting routes and easy access, these crags see relatively few visitors – on Friday we were the only ones on the whole crag! Not that I’m complaining – everyone should just keep on heading to the honeypots of Tremadog, the Pass and the Idwal Slabs…

Block – Severe 4a. (Clogwyn yr Oen) I love the routes here, I really do. Easy enough to simply be able to enjoy the incredible gas pocketed rock with all its fabulous threads and cracks and super rough texture, but still interesting enough to make for a great climbing experience. This route can only be found in the Meirionnydd guide as it wasn’t deemed good enough to go in the selected North Wales Rock book, but, like its unsung neighbouring routes it is actually very good.

I must note though, that the guidebook description is not exactly brilliant – the ‘37m’ first pitch is actually 50m to the belay at the base of the corner – I know this because I reached the end of my 50m ropes on the damp grass slope about 2m before the corner (where the magical frictional qualities of smooth rock shoe rubber on wet grass once again came abruptly into focus). You could actually split this pitch half way at a convenient ledge and crack system, and in fact I highly recommend you do this. I am also going to recommend that you run the last two pitches described in the guidebook into one as there is absolutely no sane reason not to.

SDC10044

Saturday 3 April 2010

my cold war fascination

I think it is about time I admitted to my somewhat ‘trainspotter-esque’ interest in all things cold war and nuclear technology related. I’m not sure why I feel the need to confess, I just do – ok?

I have found myself sucked into the never-ending wikipedia loop of eternal information overload whilst reading about nuclear testing and weapons development, radiological accidents, missile technologies, nuclear power generation…the list goes on. I can’t explain why I find all of this stuff so interesting – although perhaps some of my former working background and some of the places I had to visit and people I had to meet go somewhere toward explaining it (and sadly many of those stories are ones I have signed a little piece of paper promising never to talk about, otherwise I would!).

So what has prompted this little outburst? Well, whilst I was driving around Devon my mind developed a habit of entertaining itself in order to survive, and one of the things I found myself doing was looking out for and spotting any interesting current or old military or technological sites – the radio engineer in me finding the spotting of any form of transmission or radar site incredibly easy, but the places I found myself most wanting to see were understandably elusive – nuclear bunkers. In fact, the only one I’m 100% sure about was the former Exeter ROC HQ which is next to the M5 and has now been turned into a paintballing venue (and yes, I would love to have a go!).

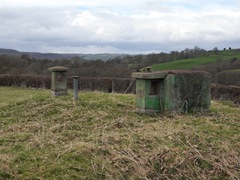
Upon arriving home I’ve spent a little time browsing some of the info on the Subbrit database (mainly in the Cold War section, as many of the other types of site they list I have seen enough of to find incredibly boring), and today I finally got round to walking across the village to check out our own old ROC bunker:

http://www.subbrit.org.uk/cgi-bin/webdata_roc.pl?fid=987856339&query=pagenum%3D1%26cgifunction%3DSearch%26County%3DMontgomeryshire&cgifunction=form

SDC10145

SDC10146 

Sadly the access hatch has been filled with rubble so we couldn’t get inside, and as such my new mission is to find one I CAN see inside of. What an interesting life I lead huh?

Thursday 1 April 2010

gear we like, part 4: headbands

Ok so this one is going to be a touch controversial as not everyone looks good in a headband…in fact some would probably say that nobody looks good in a headband, but I would like to offer some evidence to the contrary, take this picture of my friend Matt, doesn’t he just look lovely?

SDC10559

Seeing as it is just a tiny bit unfair of me to use Matt as my sole [mildly embarrassing] example of headband wearing (sorry Matt!), here is a picture of me wearing mine to balance things out:

SDC10557

You’re probably now wondering why on Earth I am singing the praises of fleecy headbands now that I have managed to establish that they aren’t exactly the height of fashion (unless of course you wear one with sunglasses too, then you get points for the ‘French Alpine Guide’ look – after all, as everyone knows, French Alpine Guides are all about looking chic whilst p*ssing everyone else off with their lack of consideration or manners…but I digress…), so here we go.

Advantages:

  • Keeps your ears warm (especially good when there is a biting cold wind)
  • Don’t make you overheat as much as a hat when working hard (so fantastic for hill walking and walk-ins to climbs when it isn’t super cold, but still cold enough to want something on your head)
  • Fits well under a helmet (doing pretty much the same job as a hat, bearing in mind your helmet will cover the top of your head anyway)
  • Can be worn underneath a hat to give even more protection to your ears (great if your hat doesn’t quite cover your ears, or if it is really, really cold)

Disadvantages:

  • Not as warm as a hat (duh!)
  • Makes you look a bit ‘special’ (unless you’re in the Alps)

I must comment though, my head is obviously slightly smaller than the average circumference as it took me ages to find a headband that actually fit and didn’t slip down (thank you to Patrick and his trip to Millets of all places!!), so whilst they may well mostly be labelled as ‘one size fits all’, I can assure you, they don’t!

Also, in the UK outdoorsy headbands only seem to be available in black, which is arguably the best colour for most things, but I can’t help but think a funky brightly coloured one (or even one with stripes?!) would be great, after all you’re already choosing to look a bit odd by wearing one, so why not stand out properly!