Wednesday 30 December 2009

grivel with a swivel

Apologies to everyone who is interested in reading something, well, interesting on this blog, as this is yet another gear and engineering post, once again related to ice axes although this time to do with leashes and lanyard systems. I promise I will come up with something different to write about soon! Anyway…

Climbing ice or mixed routes with a pair of ice axes is an exhilarating and fulfilling experience, but should something go seriously wrong, say for instance you drop an axe, it can go from being fun and challenging to serious and terrifying in a matter of seconds.

I’m not going to talk about the differences between climbing leashed or leashless, as for me it is a no brainer – I am very firmly in the leashless camp. That said, I do own a set of clipper leashes for my axes, but I somehow doubt they will ever really be used again…

FILE0100 crop
I used to use my clipper leashes in scotland in winter on mixed routes where, if I did somehow drop an axe things really wouldn’t be good. So they were more for tool security than my own (I’d rather shake out when I’m pumped than simply hang all my weight from my wrist loops). On a trip to Cogne climbing frozen waterfalls and deciding to try out the clipper leashes whilst seconding a WI4+, I discovered just what a pain in the butt they can be – I got pumped simply trying to detach from the axes to remove the ice screws. Ok so I’m sure I would get used to the clipper system through use and wouldn’t feel so much like no sooner had I unclipped, I would then proceed to dislodge my axe and send it plummeting down into the void, but, why would I bother? Why would I try to get used to a system I don’t particularly like when there are much better options?

And so we get to the meat of the post. Leashless lanyards.

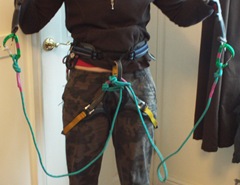
On that same Cogne trip, the evening after my little escapade with the leashes, I decided there and then that I wasn’t going to wear them on anything steep where I felt I could knock an axe down. So how would I stop them being easily droppable? I took a length of 7mm tat out of my bag and tied two cord lanyards.
FILE0095crop
Now, these lanyards worked brilliantly. Long enough that you could still swing at full stretch, and pretty unobtrusive on steep ice. They did have one major shortcoming however: on anything less than vertical they dangle round your knees providing a very real tripping hazard (especially dire in easy angled gullies), so my thoughts shifted to the new type of ‘spring leash’ systems now being made by both Grivel and Black Diamond.

Now, me being both skint and keen on anything I can make myself, I decided initially that I would make my own version using 16mm tubular webbing and shock-cord, but an epic evening spent not being able to get the cord far enough through the webbing (a problem that could be worked around I’m sure) led me to want to have a proper look at the commercial systems, to see whether I really was wasting my time for very little saving.

I had a look at the Grivel Double Spring Leash and the Black Diamond Spinner Leash, making comparisons of their respective advantages as I played around in the shops making myself look like a deranged idiot:

Grivel Double Spring
  • Available with or without crabs
  • Supplied crabs feel less crappy to me than the BDs
  • Less tension than the Black Diamond meaning they are less obstructive to your axe swing
  • Cheaper (buying without crabs makes it significantly cheaper than the BD)
Black Diamond Spinner
  • Same strength rating as the Grivel (rated to 2kn, equivalent to the 200kg claimed by the Grivel)
  • Very snazzy looking and innovative springy webbing stuff
  • Captive crabs (for some these would be an advantage, even though I don’t like them)
  • In-built very neat little swivel, meaning that tangles are completely avoidable 
So they both have their own relative merits, but I think it’s probably pretty obvious which set I plumped for.
I bought a set of the Grivel Double Springs, without the supplied crabs (£15 without and £25 with) – I had my own 400kg rated ‘accessory crabs’ I bought a while back (when I was thinking about making my own clipper leashes, but I digress), which, seeing as the spring leash itself is only claimed to hold 200kg, are perfect. Sadly I can’t seem to find these little crabs in the shops again anywhere as I’d like to buy a few more.
So, yes, I bought the cheapest ones. I really like the swivel on the Black Diamond, but am not prepared to pay £40 for them, just for that, especially when I can self-engineer my own version (it’s the best of all worlds, mwahahaha!).

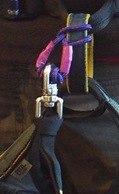
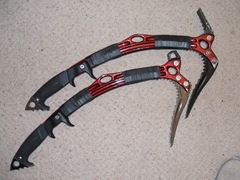
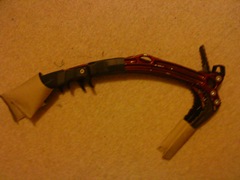
A tiny bit of effort later and here we have it, the Grivel with a Swivel.

FILE0092 (2)crop
The swivel is a 6mm stainless steel captive eye swivel shackle, bought for about £3-4 from a sailing chandlery (incidentally the swivel itself has a SWL of 1tonne – meaning that it could probably be shock loaded with a force equal to about 5 times that without breaking), larksfooted into the leashes and with a short length of 4mm accessory cord tied through the other side to attach to my harness or wherever I decide to attach. Ok so the swivel is definitely heavier than BD’s offering, but significantly cheaper and stronger. I will detach it and leave it behind when I want to go super lightweight (i.e. Alpine climbing) – an option the BD simply doesn’t offer you.
FILE0092 (2)crop swivel
To say I am pleased with these is an understatement – for me, this is pretty much the perfect system. That is, until I find an even smaller and lighter swivel capable of fitting my needs.
Thursday 24 December 2009

axe update and a brief tutorial on using self amalgamating tape

I’m an engineer. I trained and studied as an engineer. I worked as an engineer. My husband is an engineer. What is my point? Well my point is that I have an engineering mind – I like to solve problems, I like to improve things, I like to find alternative ways of doing things and most of all I like doing it all myself. This may be part of the reason why winter and ice climbing appeal so much to me – gear and glory and all manner of opportunities to utilise an analytical mind.

I post previously about modifying my ice axes to make them a bit more user friendly (primarily when dry tooling) by using self-amalgamating tape to enhance the grip of the shaft. I also promised I would write an update after I had tested the new grips out, and this is it.

My concerns about the tape getting worn and damaged still stand, but don’t feature too highly as an issue as replacing the tape is very simple and inexpensive. Anyway, not only have I tried out the new grip position on the dry tooling board, but I have tried them out on an ice route (see previous post about Aladdin’s Mirror Direct). My observations:

  • When dry tooling, the tape provides a much better grip than just the slippery shaft, allowing gloves to ‘stick’ rather than just slide around.
  • When ice climbing the grip is likewise improved, which does provide you with additional options for gripping and resting when climbing leashless, especially noticeable when wearing thick gloves (I liked it, lots).
  • When out in winter, when it is cold and damp out, you are plunging the axes in snow, using them in ice and just generally getting cold, the tape insulates the shaft and makes the axe much more pleasant to hold (i.e. not freezing cold metal).

The biggest revelation for me was how much more pleasant the axe shaft was to hold with the tape on compared to the bare metal shaft. Holding onto the shaft was like connecting yourself to a heat-sink – the metal is COLD, and as such makes your hands cold, even through gloves. Now, this is all fairly obvious stuff really, but one of those things that I needed to try out and experience to learn the real lessons…

So, some further modification has had me make a ‘third grip position’ with tape, this time at the top of the shaft, not for pulling on in the conventional sense, but to make using the axes in the daggering* position more pleasant and less likely to induce the hot aches.

To say I am pleased with these simple little modifications is an understatement, not only are they hugely effective, but they actually look quite good too (there’s definitely something about tools that look like they’re used and cared for, and that some thought has gone into their use, isn’t there? A bit like the opposite of the ‘all the gear, no idea’ notion).

DSCF3330

Notes for those interested in performing similar modifications:

The tape you want is self amalgamating tape, available from places like Maplin or Screwfix. This tape is essentially just a strip of rubber which, when stretched and stuck back onto itself just self-fuses, so there is no adhesive involved to come unstuck when wet or anything like that.

Tips: the classic mistakes people make with this stuff (and having used this type of thing at work for 6 years believe me I’ve seen all kinds of basic errors) are firstly and most embarrassingly, not removing the backing tape and then wondering why it’s not sticking to itself. Give yourself a slap if you do this. Secondly, the other classic error is to simply stick the stuff directly onto itself without tensioning and stretching it – the tape is springy rubber and you need to stretch it out as you apply it (stretch it as much as you like, just don’t snap it), so that the elastic pull creates a sort of tensioned fusing joint where it contacts itself. Remember this tape has no glue and so it does not stick to things – you need to tape it to itself for it to stick.

If you use quite a thin tape (such as the type available from Maplin), you need a minimum to two layers of tape otherwise it will simply be too flimsy. You may even want 3 or 4 layers depending on what you are doing and the use and wear it’s going to take.


*daggering – holding the axe at the top of the shaft, just beneath the head and stabbing the pick directly into the slope, not swinging it from the handle. This is a technique used on easier angled snow and ice slopes.

winter climbing tips: axe transport

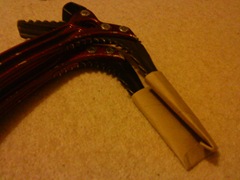
Ice axes – classified by police as offensive weapons. They are…well…sharp and dangerous. Not only are they sharp and dangerous when wielded by some drunken moron in a crowded nightclub, but they are also a great tool for punching holes in helmets or ripping gouges in expensive clothing when packed in your holdall, trust me on that one.

This little idea just came to me in a flash of inspiration whilst I was seated on the throne (you know, where you get all the best ideas!), and will be most useful to people transporting their ice axes when flying – that is, when the axes need to be packed in a big bag with lots of other stuff. Now, lots of people do complicated things like removing the picks or wrapping everything in bubble wrap, both options that are quite frankly a pain in the bum.

So, want a way to quickly and easily protect your axe picks and spikes (and consequently everything else in your bag)? Want it to be cheap/free and maybe even involve recycling?

DSC00073

DSC00074Tada!

I give you, the humble toilet roll tube!

first winter route of the year

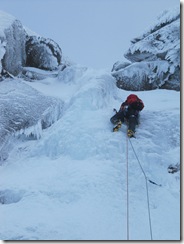
Patrick and I journeyed up to the snow and ice of the Cairngorms over the weekend, the aim being to have 3 days climbing in Coire an t'’sneachda. Monday was our first day out (and my first day out after contracting a nasty strain of the flu a couple of weeks ago), so we headed for Aladdin’s Mirror Direct – a route that I seconded last year as my first experience of ice climbing, and as such, had a real desire to go back and lead myself.

The ice fall was in surprisingly good condition considering it is only December, and we followed another pair up it, and then up the last 2/3 pitches of Aladdin’s Mirror.

I would just like to say a big thank you to Donald, the climber I met at the belay above the ice fall, who left one of his cams for me to use. Unfortunately I can’t read the postcode written on the label on it, so I’m currently on a mission to find out where to return it to, but anyway…

The route was a mixed experience for me, the ice fall was fine, although I will admit, pure ice climbing in my stubby ‘mountaineering’ crampons is not that pleasant an experience – but my G14s (currently set up as mono-points) would have been a terrible choice to use given the conditions on the rest of the route, an easy angled snow/ice gully. The gully was where it got ‘interesting’ for me, because I had made a rather foolish decision sometime last week: calf raises. I did a couple of sets of 50 calf raises, to the point of cramp in the muscles, and unfortunately seem to have given myself a kind of perma-cramp. Front pointing up easy angled sh*tty snow and ice in a gully was probably the worst and most painful thing I could have done given the state of my perma-cramped legs – I did not enjoy it at all.

(Actually, the state of the rock was somewhat challenging. We spoke to a fair few other climbers who had done actual mixed lines and they all agreed with what we had experienced – lots of very pretty rime ice build up on the rock, that was completely unusable for climbing, and also lots of ice and snow making finding gear in cracks damn near impossible.)

The gully was also a great big pointer as to just how much the flu has taken out of me, I mean, a few weeks ago I was feeling strong and reasonably fit. Now, I have a base level of fitness lower than I can remember it being for years, oh and no stamina whatsoever, as I am about to explain with some not inconsiderable disappointment…

After Monday’s efforts I was ‘done in’. Tuesday simply wasn’t going to happen – I woke up and just knew that I wouldn’t even manage the [easy] walk-in. So we spent the day bumming around cafes and shops (more on that in a later posting). The real kicker to this was that the day turned out to be stunning. Sort of Alpine in style of weather – beautiful clear blue skies and very very cold, so perfect for climbing. We were hoping that Wednesday would be similar, but British weather is a fickle and unpredictable thing, so of course we had 4-5 inches of snow overnight meaning that the ski road was closed and of course conditions would have been really rather hard going and unpleasant. So we drove home.

017

Saturday 19 December 2009

winter climbing tips: ginger cake

DSCF3312

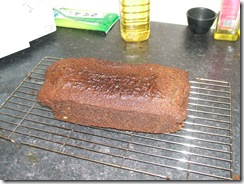
By far the best food I’ve found for a winter day out in the hills, be it Scotland, Norway or the Alps, is a tasty, sugar laden cake that simply does not freeze.

Behold! The ginger wonder.

Ingredients

  • 150g unsalted butter (I have used salted and it doesn’t make a massive difference actually)
  • 125g dark muscovado sugar
  • 200g black treacle
  • 200g golden syrup
  • 3 teaspoons ground ginger
  • fresh, finely grated ginger, lump approx. 2-3 thumbs

note: I’ve upped the ginger amounts massively from the recipe I was originally using, and even these quantities aren’t overpoweringly strong. Beware of using much more fresh ginger though as it seems like too much can make the cake rise a little oddly.

  • 1 teaspoon ground cinnamon
  • 250ml milk (we only ever have semi-skimmed but I don’t think it really matters what type of milk)
  • 2 large eggs, beaten
  • 1 teaspoon bicarbonate of soda dissolved in 2 teaspoons of warm water
  • 300g plain flour

Method

Preheat your oven to 170 C (gas mark 3).

Pre-line a loaf tin with baking parchment.

Choose a large saucepan (you can mix the entire cake in this), and melt the butter, then add the sugar, treacle, syrup, ginger and cinnamon and ‘melt’ these together (use a low heat so as not to burn the butter to the pan, be patient!).

Take the pan off the heat and add the milk, eggs and the bicarbonate of soda. Mix (don’t worry that the mixture seems to be layered at this point).

Sieve the flour into the batter mix, slowly and in increments, whilst stirring (I usually add a bit, stir it all in, then add some more until it is all in, roughly 4 or 5 batches). Now, at this point it WILL be lumpy, no matter how careful and patient you have been, so the next stage is to stir, stir, and stir some more – trying to work out most of the lumps. You may be stirring for quite a while, but eventually you should end up with a nice silky looking liquid batter.

Pour the batter into your pre-lined tin, then carefully put it in the oven (middle of the middle shelf), for 45mins – 1hour (keep checking on it – when it’s done a knife or skewer inserted into it should come out clean – any gooey residue and it needs a touch longer.)

Once it is cooked, take the cake out of the oven and carefully lift it out of the tin, onto a cooling rack. Let it cool! When it’s feeling solid enough, remove the baking parchment, then replace the cake on the rack and let it cool completely (trust me on this, it actually tastes better when it has cooled down! Honest!)


And there you have it! Glorious sticky ginger cake. Cut it up, stick some in the freezer if you want to keep it (note: it probably won’t actually freeze solid – one of mine hadn’t gone hard even after 2 months in the freezer!)

Oh, and one more thing to be aware of – this stuff is deadly. Or at least it appears deadly on the security scanners at airports when it’s packed into your hand luggage. I kid you not…

Tuesday 8 December 2009

can women get man flu?

I think it must be possible, I mean I don’t think I have real flu or even swine flu, but this is definitely much worse than a cold (and it came on really quickly), it’s also not the lesser known ‘wine flu’ – that requires about 8 glasses in order for the symptoms to appear and sadly I have had none.

Anyway, today I have spent the whole day bumming around in my dressing gown feeling sorry for myself and occasionally dosing myself up with paracetamol. In my somewhat dishevelled state I managed to finish reading one of the books I currently have (had?) on the go - ‘The Real Heroes of Telemark’ by Ray Mears (book of a TV series maybe? We’re looking into that). Having climbed in Rjukan last year and having a 2 week sortie planned for February, it seemed appropriate to actually find out some of the real history of the place and what happened during WWII and the ‘heavy water’ sabotage raids, rather than simply leaving my knowledge at the ‘have watched the crappy hollywood blockbuster and so have no real facts in truth’ stage.

I highly recommend reading this book and/or finding out about these events – I for one had no idea that Hitler even had an atomic weapons programme, let alone that the simple yet incredible actions of a few highly trained men in destroying and disrupting the production of ‘heavy water’ (again, despite being interested in this sort of thing, I didn’t even know what heavy water was) in a small hydro plant on the edge of one of the most inhospitable wilderness areas on earth, could well have swayed the outcome of the war.

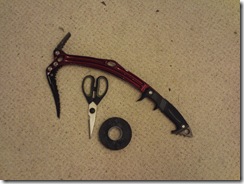
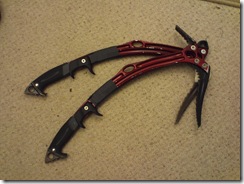
Right, on a different topic, today I have also knocked another item off of my chores ‘to do’ list – Phil very kindly bought me a new roll of self amalgamating tape to modify my ice axes with…

FILE0091 Before

FILE0094 After

Only trial will show whether my newly modified secondary grip position (oooh get me, sounding all techy) will actually be any good. My worries are that the construction of the shafts (hot-forged I-beam construction – more techy stuff, ooooh) will mean that the tape will get damaged/worn pretty quickly because of the big gaps behind it. A more standard shaft would not present a problem, but oh no, I have to have ‘different’ axes of course (don’t get me wrong here, I love them to bits!).

I will update on the state of these once they’ve seen some use on the board.

Monday 7 December 2009

egg banjo

Apparently a fried egg sandwich is called an Egg Banjo.

Awesome. You learn something new every day!

Friday 4 December 2009

dry tooling

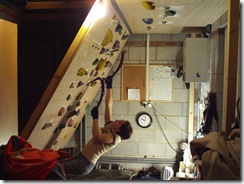
Ok so at long last I’ve got the board equipped with enough of my fabulously engineered, home made, wooden dry tooling holds to start some serious training sessions.

I’ve never felt a pump quite like it – a deep deep burn inside your arms. Wonderful!

FILE0105

FILE0104